
There are many reasons why someone might consider pulling out a tooth at home. Whether it’s a loose baby tooth in a child’s mouth or an adult tooth that has become damaged, decayed, or infected, the idea of pulling it out yourself can seem appealing for convenience or cost savings. However, pulling a tooth at home should never be taken lightly. While it is possible in certain cases, there are significant risks involved, and it is important to understand both the proper techniques and the potential dangers before making any decisions.
In this blog, we’ll guide you through how to safely and painlessly pull out a tooth at home, but with important caveats that you should consider before taking this step. Remember, when in doubt, it’s always best to consult a dentist for professional care.
Why Consider Pulling a Tooth at Home?
Before diving into the process, let’s take a look at why someone might want to pull a tooth at home in the first place. Some common reasons include:
- Loose Baby Teeth: Children often have loose teeth that are ready to fall out naturally. Sometimes, kids may feel the need to speed up the process to avoid the discomfort of a wobbly tooth.
- Decayed or Damaged Teeth: A severely decayed or damaged tooth that cannot be saved with a filling or crown might need to be extracted.
- Abscessed Teeth: An infected tooth with a dental abscess might require removal if the infection cannot be treated through other means.
- Financial or Accessibility Concerns: Not everyone has easy access to dental care or can afford the expense of a dental appointment.
While these may be valid reasons, it is crucial to carefully assess whether pulling a tooth at home is truly the best solution.
When Should You NOT Pull a Tooth at Home?
Certain circumstances should absolutely be avoided when considering tooth extraction at home. These include:
- Infected or Impacted Teeth: Teeth that are abscessed or severely infected should be treated by a dentist. Pulling out a tooth with an infection can spread the bacteria to other parts of the body and cause severe complications.
- Broken or Fractured Teeth: If the tooth is already broken, it’s better to see a dentist. A broken tooth may have sharp edges that can cause injury to the surrounding tissues and gums.
- Teeth Without Adequate Loosening: If the tooth is not loose enough to be easily pulled, it is better to wait for it to loosen naturally or get professional help to avoid breaking the tooth or damaging the surrounding tissue.
- Underlying Health Conditions: If you have a medical condition, such as diabetes, heart disease, or blood clotting disorders, you should consult your doctor before considering tooth extraction.
Steps for Safely Pulling Out a Tooth at Home
If you’re sure that pulling out the tooth is necessary and you are in a situation where professional help is unavailable or unaffordable, here are the general steps for safely and painlessly pulling out a loose tooth at home:
1. Gather Your Tools
Before attempting to pull out a tooth, you need to make sure you have the right tools. These include:
- Sterile gauze or cotton ball: Used to control bleeding and provide a firm grip on the tooth.
- Clean dental floss or a piece of string: This can be used to loop around the tooth to help with the pull.
- Tongs or pliers (optional): If the tooth is particularly stubborn, a set of clean pliers or dental forceps can be used.
- Pain reliever: Over-the-counter pain relievers such as ibuprofen or acetaminophen can help alleviate any discomfort.
- Antiseptic mouthwash or saltwater: For cleaning the mouth and the extraction site before and after the procedure.
Make sure everything is clean and sterilized. It’s essential that the tools you use are free from germs to avoid infection.
2. Prepare the Area
Make sure you are in a well-lit area, preferably with a mirror, so you can see clearly what you are doing. Wash your hands thoroughly and wear gloves if possible. If you’re extracting a baby tooth from a child, make sure they are calm and comfortable.
For adult teeth, the best time to attempt an extraction is when the tooth is already loose. You don’t want to force a tightly held tooth out, as this can cause damage and pain.
3. Numb the Area (Optional)
Although most people may experience minimal discomfort with a loose tooth, it’s always a good idea to numb the area before proceeding, especially if you’re dealing with an adult tooth that might be more firmly in place. You can use an over-the-counter topical anesthetic gel or a cold compress to numb the gum tissue around the tooth. You can also take a pain reliever in advance to minimize discomfort during the extraction.
4. Loosen the Tooth (If Necessary)
If the tooth is not fully loose but you believe it should come out, you can use a clean gauze or cotton ball to wiggle the tooth back and forth gently. This movement will help loosen the tooth from its socket. Avoid applying too much force or pulling too hard, as this can cause damage to the surrounding tissue or even break the tooth.
If the tooth doesn’t easily move after gentle wiggling, it’s best to wait another day or two for it to loosen naturally or consult a dentist for help.
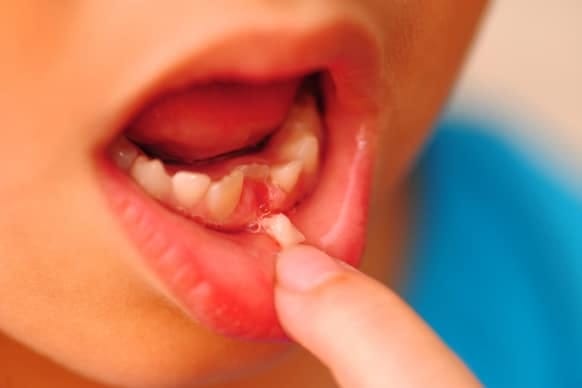
5. Pull the Tooth Gently
Once the tooth is loose enough to come out with minimal resistance, it’s time to pull it. Using a piece of clean dental floss, tie it securely around the base of the tooth. Alternatively, you can grip the tooth with a clean pair of pliers or tongs.
Gently pull the tooth back and forth while applying slight pressure in an outward direction. Avoid yanking or jerking the tooth, as this can cause unnecessary pain or injury to the gum tissue.
Once the tooth is free from the socket, it should come out fairly easily.
6. Control Bleeding
After the tooth is out, there will be some bleeding from the extraction site. This is normal. Use a clean piece of gauze or a cotton ball to apply pressure to the area. Hold it there for about 10-15 minutes or until the bleeding stops. If the bleeding doesn’t subside or if it’s excessive, seek professional help immediately.
7. Clean the Area
Once the bleeding has stopped, rinse your mouth with a mild saltwater solution or an antiseptic mouthwash to clean the area and reduce the risk of infection. Avoid spitting or rinsing too vigorously, as this can dislodge any clot that may have formed in the socket, which could lead to a dry socket—a painful condition where the bone is exposed.
8. Aftercare and Follow-Up
In the days following the extraction, be sure to maintain good oral hygiene to prevent infection. Avoid eating hard, crunchy foods or drinking through a straw, as these actions can cause the blood clot to dislodge. Continue to rinse with salt water and keep the area clean.
If you experience significant pain, swelling, or signs of infection, such as a fever or pus, seek professional dental care immediately.
When to Seek Professional Help
If at any point you feel unsure, uncomfortable, or experience excessive pain or complications, it’s important to seek help from a dentist. Dental professionals have the expertise and equipment to extract teeth safely and address any complications that might arise.
Conclusion
While pulling a tooth at home may seem like an appealing option, it’s not without its risks. It’s only recommended in specific situations where the tooth is loose and there’s minimal pain or infection involved. Always ensure that you take the proper precautions, follow the steps carefully, and seek professional help if necessary. When in doubt, consulting with a dentist is the best course of action for your oral health.